Ever write a long paper/report (which you spent hours planning, writing, and many more hours editing) and just before you’re about to submit it, you suddenly realize you need to create a Table of Contents (TOC) to give it that “professional” look?? In a panic, you then spend as much time searching Google on how to create one of those silly things as you did writing the entire paper! Here is a simple 7-step approach to follow to ensure you have that TOC when you need it most.
1. Create heading’s for your paper (titles for each section or main idea) that you want to show up in your TOC. This is the structure to your paper. You’ll need to do some planning, organizing and thinking through how you want to communicate your thoughts on paper.
Tip: You can create a TOC at any point during your writing! (at the start, in the middle, or at the end)
2. Press “Ctrl + Enter” to create a blank page you want your TOC to appear on
3. Put cursor where you want the TOC to be
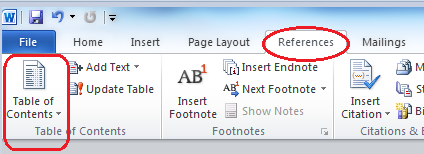
4. Go to Reference, select the Table of Contents dropdown, and choose what style you want
When you get this message, just press OK

If nothing shows up, don’t freak out! We’ll fix this in the next step!

5. Select and highlight each heading title, and on the Home tab choose “Heading 1” in the Styles box (This is how you get your headings to show up in the TOC)
![]()
Tip: I like to select one heading at a time, change it to Heading 1 and update the TOC to make sure I get everything I need (You can do it all at once, no problem)
6. Now, go to your TOC and click “Update Table…” (You may have to move your mouse around over it, or click in the TOC box to get it to show up! – This tip is on me, you’re welcome!)
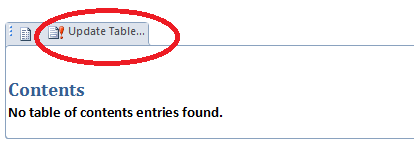
Select “Update entire table” & click OK

Tip: Page numbers are automatically included when the TOC is created, even if you haven’t set them up yet. (To learn how to setup page numbers, see the Bonus Tip below!)
Congratulations! You now have titles in your TOC!!
7. Continue working on your document, remembering to SAVE your work often & any changes you make going forward repeat #6 (to update your TOC – mainly to keep the page numbers up-to-date for each section)
Bonus Tip!!
How to add the infamous page numbers (and get them to ACTUALLY work)
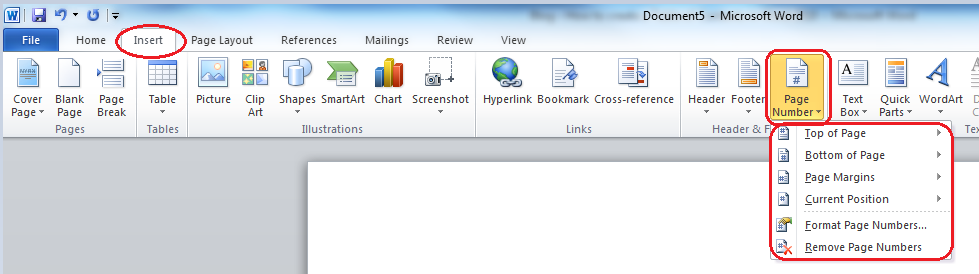
1. Go to Insert
2. Chose “Page Number”
3. Open the down arrow and chose where to put page numbers (I.e. Top of page, Bottom of page – For me, I like my page numbers on the bottom right, which is the 3rd option, “Plain Number 3”, under “Bottom of Page” selection)
4. To get Page Number 1 from not showing up on page 1
In the “Header & Footer Tools” toolbar, in the “Options” box, check “Different First Page”
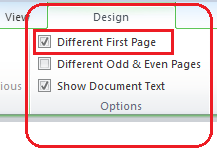
Page numbering begins on page 2

